SECOLINK Europe SIM card

SECOLINK Europe SIM is a special telecommunications card designed for use in SECOLINK products, such as the GSV7 communicator. Replace your communicator's SIM card with the SECOLINK Europe SIM and enjoy its benefits:
  • likely the lowest telecommunications service cost;
  • no contracts or price increases;
  • compatible with all network operators;
  • access to all paid SECOLINK online services (depends on the device in use):
    • real-time delivery of control commands to the system;
    • instant delivery of notifications from the system to the app SECOLINK PRO, compared to SMS services;
    • system control available from smart devices that use Wi-Fi only (e.g., tablets);
    • real-time update of the security status icon (armed/disarmed) in the app;
    • ability to view technical information about the system;
    • ability to see how long ago motion was last detected in zones (useful for monitoring elderly people);
    • option to add compatible video surveillance cameras to the app;
    • system control is carried out exclusively through the app.
Purchase a SIM card

1. Firmware version

To use the SECOLINK Europe SIM card in the communicator, the communicator firmware version must be 2.06 or higher.

The current version of the communicator can be found by sending the SMS command "i":
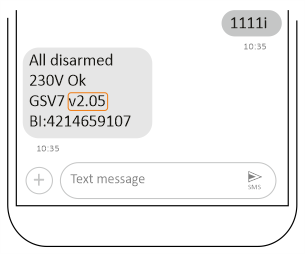
  1. Send an SMS message to your communicator, starting with your PIN code used to control the system, followed by the status request command "i". For example, SMS: 1111i – where "1111" is the user PIN code, and "i" is the command (see Figure 1).
  2. Depending on how the communicator is programmed, it will respond with either plain text or an "encoded" response. If you receive an "encoded" response and are using the SECOLINK PRO app, you can view the information there for easier access (see Event Log).
OR
Figure 1. Firmware version

2. Upgrade the communicator (if the version is older than 2.06)

There are two ways to upgrade the communicator:

1. Upgrade via internet:

  1. To start the upgrade, text your communicator. Begin the SMS message with your PIN code, followed by the word "UPGRADE". For example, if your PIN is 1111, you would text: 1111UPGRADE (refer to Figure 2 for more details).

2. Upgrade via USB:

  1. To update the communicator, a computer with the MS Windows operating system, a USB cable with a micro-B connector, and additional software from www.secolink.eu are required. Detailed instructions for updating the communicator can be found here.
Figure 2. Firmware upgrade

3. Find out your communicator's BI code

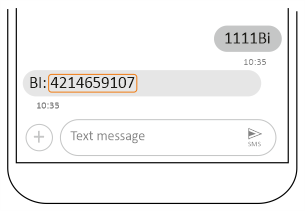
  1. To find the BI code, text your communicator. Start the SMS message with your PIN, followed by the letters "Bi". For example, if your PIN is 1111, you would text: 1111Bi (refer to Figure 3 for more details).
  2. Depending on how the communicator is programmed, it will send you a response in plain text or "encoded". The 10-digit code sent is used to identify the communicator. Save it - you will need it later.
OR
Figure 3. BI code

4. Change the SIM card

1. The photo of the communicator is presented in Figure 4.

Figure 4. Communicator GSV7 

2. The communicator can be installed inside the security system box (see Figure 5, A) or removed from the box and installed next to it (see Figure 5, B). If the communicator is installed inside the security system box, opening it may trigger an alarm. If the system is connected to a security service, inform the security service before changing the SIM card. To silence a false alarm, use the system's keypad.
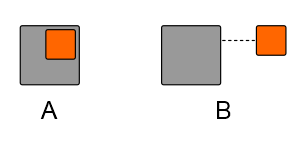
Figure 5. Installation location

3. Open the communicator by unscrewing two self-tapping screws located on the rear wall of the housing (see Figure 6). A cross (x) screwdriver is required (PH1 bit is best suited).

Figure 6. Opening

4. Remove the old SIM card from the communicator (see Figure 7).

Figure 7. Removing the SIM card

5. Insert the new SECOLINK Europe SIM into the communicator (see Figure 7).

Figure 7. Inserting the SIM card

6. Close the communicator by tightening the two self-tapping screws (see Figure 9).

Figure 9. Closing

7. Once you put in the new SECOLINK Europe SIM card, your communicator will take care of everything. It will automatically recognize the card, set itself up, connect to the internet, and register with a cloud called ALARMSERVER.NET. This lets you control your security system remotely using app SECOLINK PRO.

5. Adjust the settings within the SECOLINK PRO application

Instruction guide for an iPhone:

1. Open the SECOLINK PRO application and tap on the settings icon. In the window that opens, tap on the Edit object settings menu (see Figure 10).

Figure 10. Settings

2. Check the entered BI code (see Figure 11). The BI code must match the code that was sent from the communicator (see Figure 3).
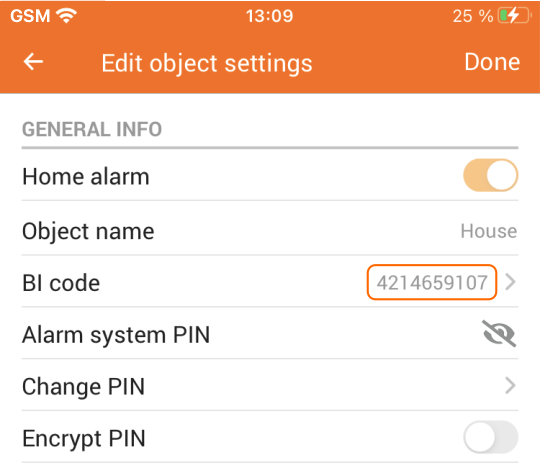
Figure 11. BI code

3. Enter the phone number printed on the SECOLINK Europe SIM card and activate the setting Data plan in SIM (see Figure 12).
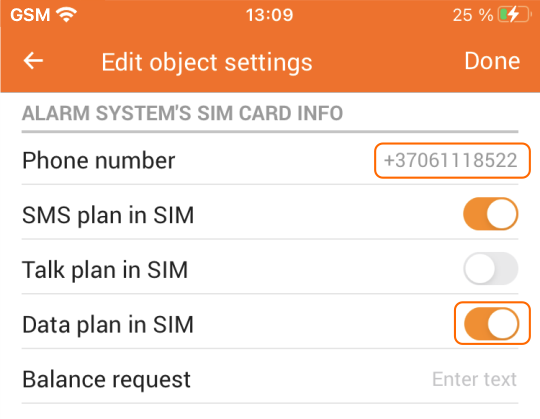
Figure 12. Phone number, data plan

4. Save the settings by clicking Done (see Figure 13).
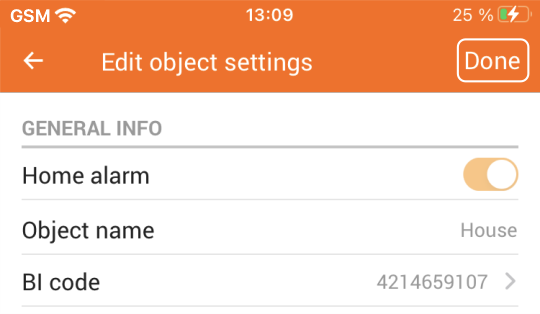
Figure 13. Saving settings

Instruction guide for an Android phone:

1. Open the SECOLINK PRO application and tap on the settings icon (see Figure 14).
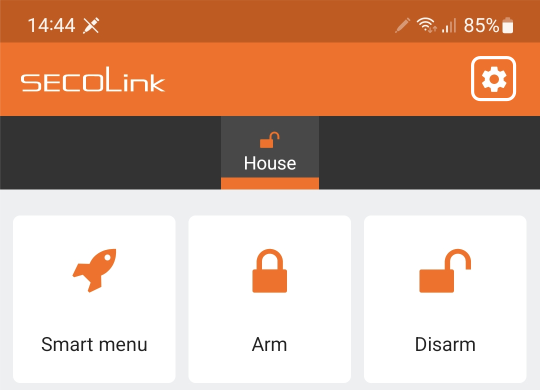
Figure 14. Settings

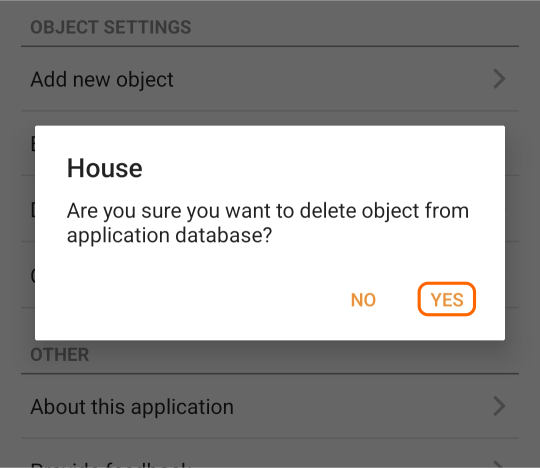
2. Delete the object (see Figure 15).
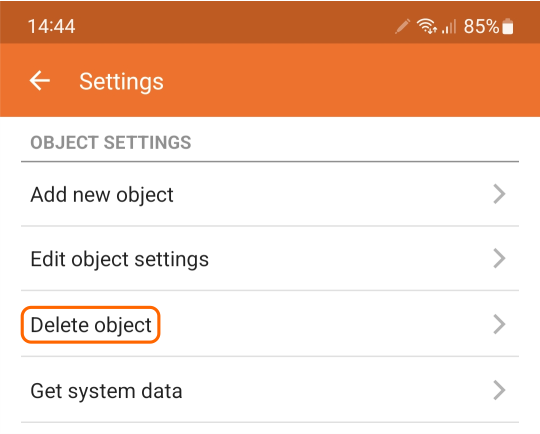
Figure 15. Deleting an object

3. Depending on whether you had more objects or just one, the app will return to the main app window or stay in the same menu. Tap the corresponding button: Let's start (see Figure 16) or Add new object (see Figure 17).
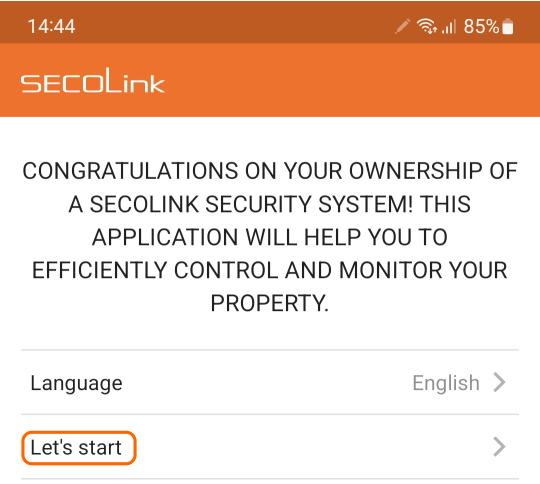
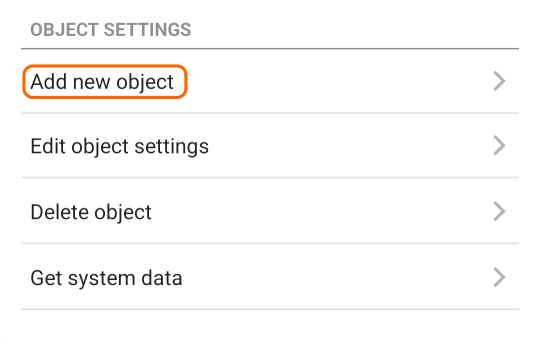
Figure 16. Main app window 
Figure 17. Object settings

4. Activate the setting In use (see Figure 18). Enter your ALARMSERVER.NET account details (1) and click Next. If you do not have an account yet, you can create one by clicking the link below that says Create an account (2).

Note: You can also create a user account in your browser at https://alarmserver.net/.
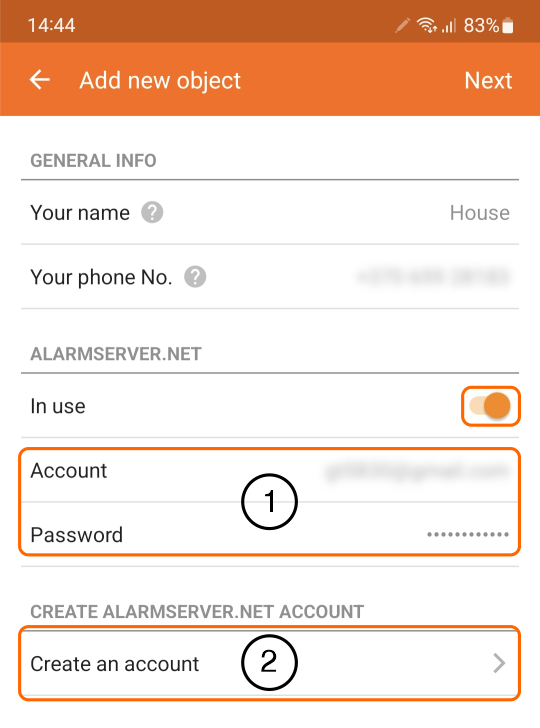
Figure 18. Logging into your account

5. If you already had an account and your object was included in it, select it from the list (1). If you have not added the object to the account or created the account just moments ago, click on the "Add new object" line (2) and follow the instructions to add it to your account using the BI code received from the communicator.
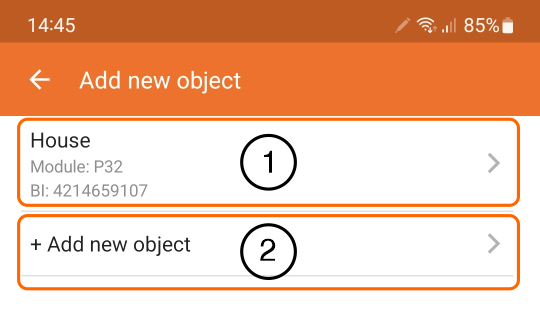
Figure 19. Selecting the object

6. Enter your user PIN code and click Next.
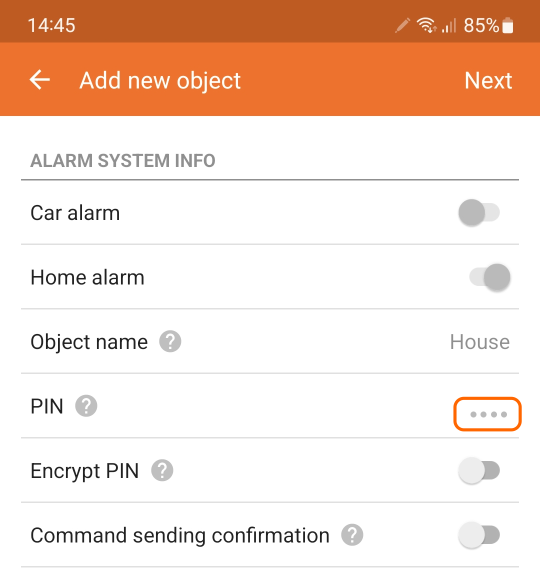
Figure 20. Entering the PIN code

7. Activate the setting Data plan in SIM (see Figure 21) and click Next.
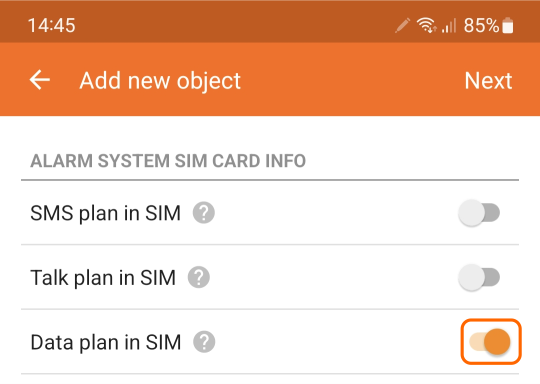
Figure 21. Supported services of the SIM card

8. Save the settings by clicking Finish (see Figure 22).
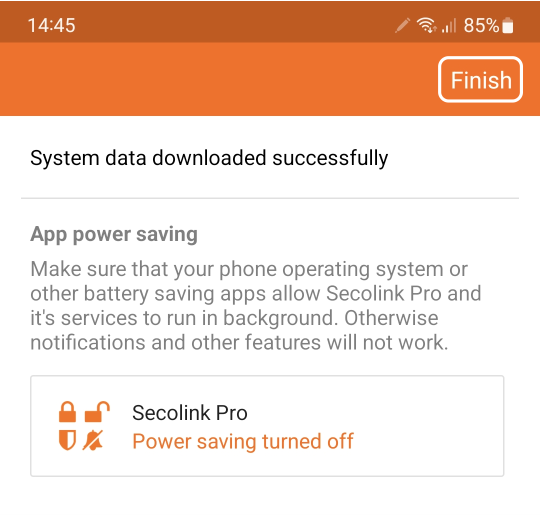
Figure 22. Data successfully downloaded from the system

9. Select which Push notifications you want to receive from the system and click Done (see Figure 23).
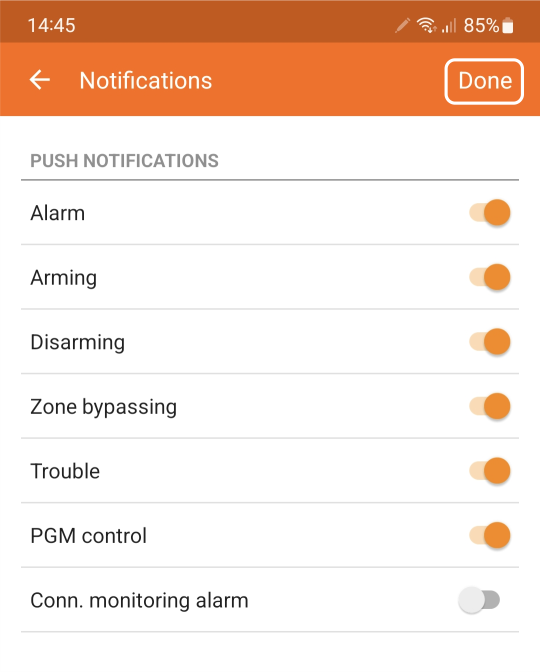
Figure 23. Saving settings

Need more information?

Send us a message and we will contact you personally

    Technical support

    Phone: +370 659 28183
    Monday - Friday: 7:00 - 16:00
    Saturday, Sunday - Closed
    © Copyright 2024 - Kodinis Raktas, UAB - All Rights Reserved
    linkedin facebook pinterest youtube rss twitter instagram facebook-blank rss-blank linkedin-blank pinterest youtube twitter instagram